In SERPsketch there are two types of sketches you can run.
A Quick Sketch is useful for a one-off snapshot visualisation of a SERP for a single keyword and the domains and URLs occupying space for that keyword. But Campaign Sketches are where the tool really comes into its own.
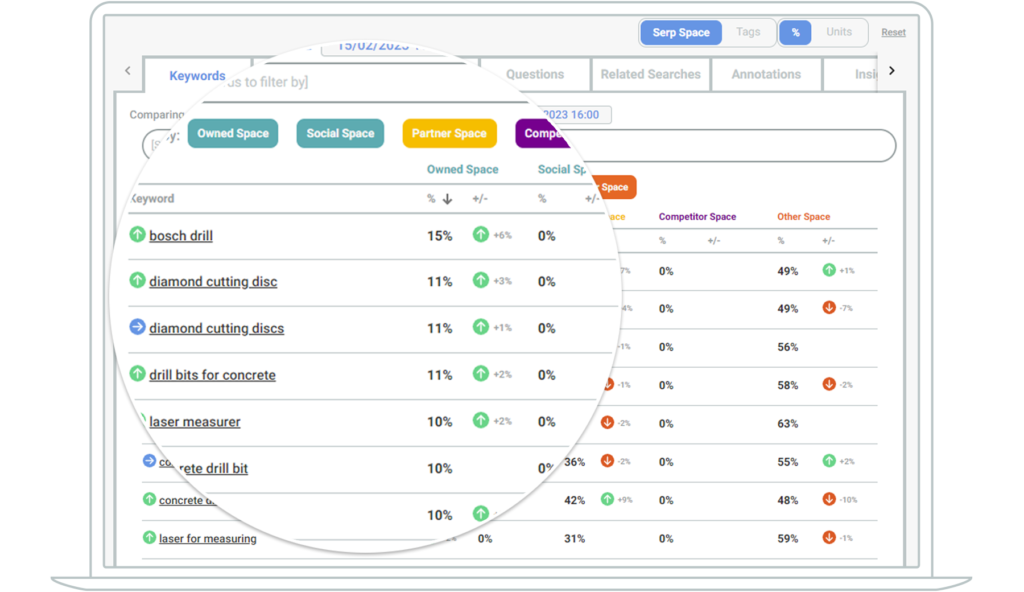
Campaign sketches are used to track keyword sets or a keyword topic cluster over a period of time, as frequently as you require: daily, weekly, monthly, or even multiple keywords as a one-off for analysis of a single point in time. The value of a campaign sketch is in tracking the volatility of the first page of Google, changes in SERP features and to monitor changes in your brand’s share of the page one SERP. This allows you to take action to adjust your search marketing campaigns to capture more share from competitors or regain lost space. Additionally you can export detailed data and use it alongside your other campaign data to better measure campaign results and outcomes, or import this data directly into Looker Studio.
Campaign Sketches are not organic rank trackers. Unlike other SEO tools in the market, SERPsketch doesn’t focus on rank tracking. Our focus is on the space available on page 1 of Google. We care about a brand’s, its competitors’ and reseller partners’ share of space in the SERP. Why? Because page one is really the only page that matters. Last year Backlinko reported that only 0.63% of users clicked something from the second page – so let’s focus on where your customers are, page one!
Planning campaign sketches
Knowing your keywords
SERPsketch shouldn’t be used as a rank tracking tool so we don’t recommend importing tens of thousands of keywords into one campaign sketch.
You do, however, need to have an idea of your keyword sets or topic clusters before starting to use SERPsketch. If you’re starting out from scratch, you can use free tools such as Keyword.io to help you determine important keywords. Or even starting with a handful of known keywords and importing them into SERPsketch, you can then use the detailed Related Searches and “People Also Ask” Questions results provided in SERPsketch to build out topic clusters and keyword sets.
It’s really important to use a single keyword set or topic cluster per Campaign so that you get the most value from SERPsketch. For example, if you were an appliance manufacturer that made vacuum cleaners, fans, hair appliances, humidifiers and air filters, you’d want to have a Campaign for each of those product lines so that you can then keep competitors, reseller partners relevant to the sketch, and so that your related search and questions results are relevant to that specific topic.
Knowing your domains
Knowing your competitors
Knowing your reseller partners
Using Dyson as an example again, it has its own retail site but it also sells its appliances through retailers such as John Lewis, AO.com, AppliancesDirect and others. When you’re selling your products or services via partners, you’ll want to make sure yours SEO and PPC campaigns are not competing against theirs. Being able to track your resellers’ share of page one enables you to ensure no budget or effort is wasted on either side.
So by this point you’ve planned out:
- Keyword sets
- Owned domains
- Competitor domains
- Reseller domains
Now you’re ready to set up your campaign sketch.
How to set up a campaign sketch
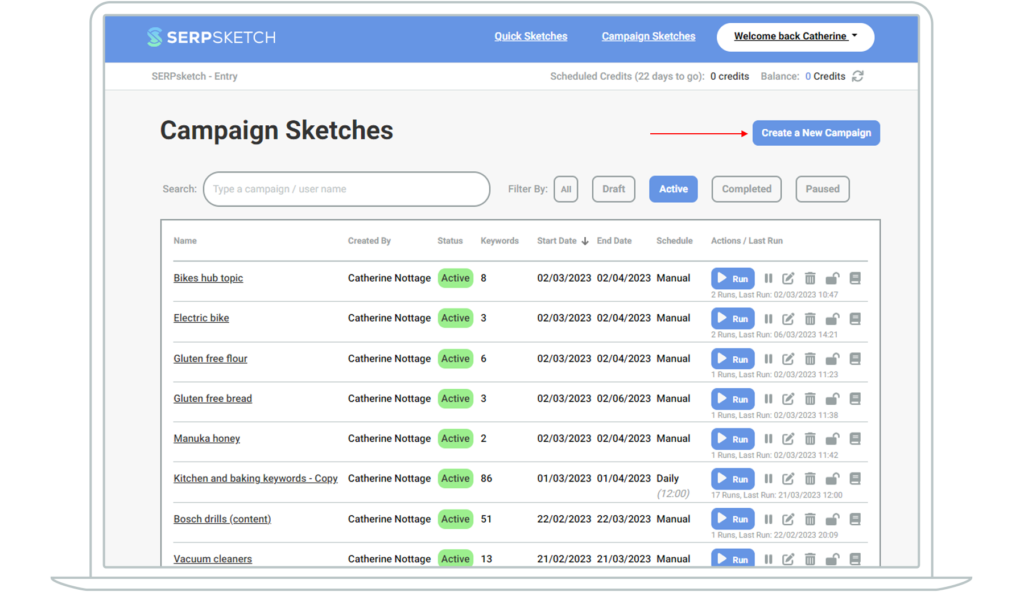
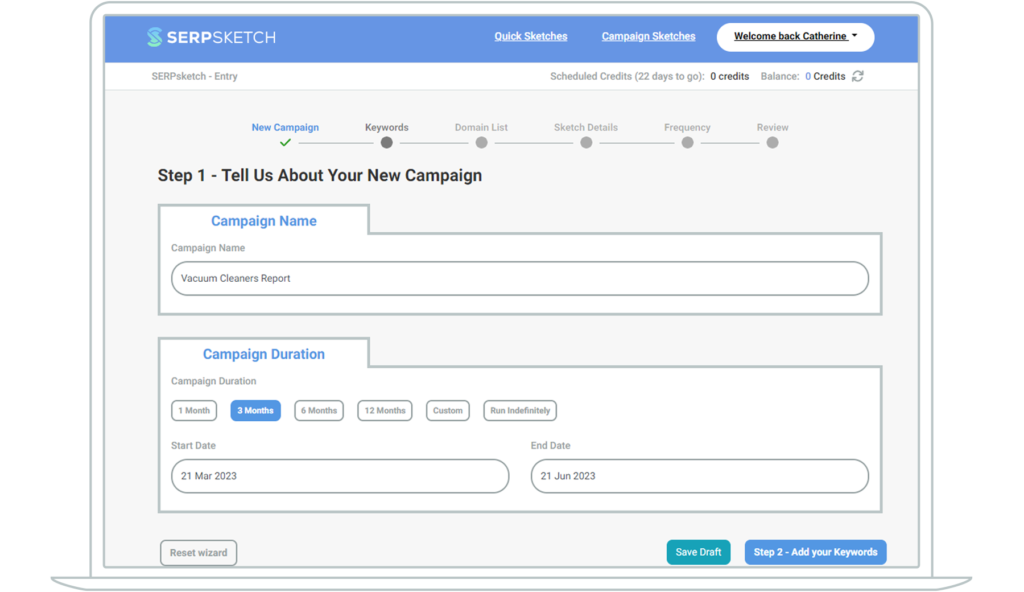
Next give you Campaign Sketch a name and set its duration – or specify custom start and end dates if you wish. Then click on to step 2 to add your keywords.
Adding your keywords
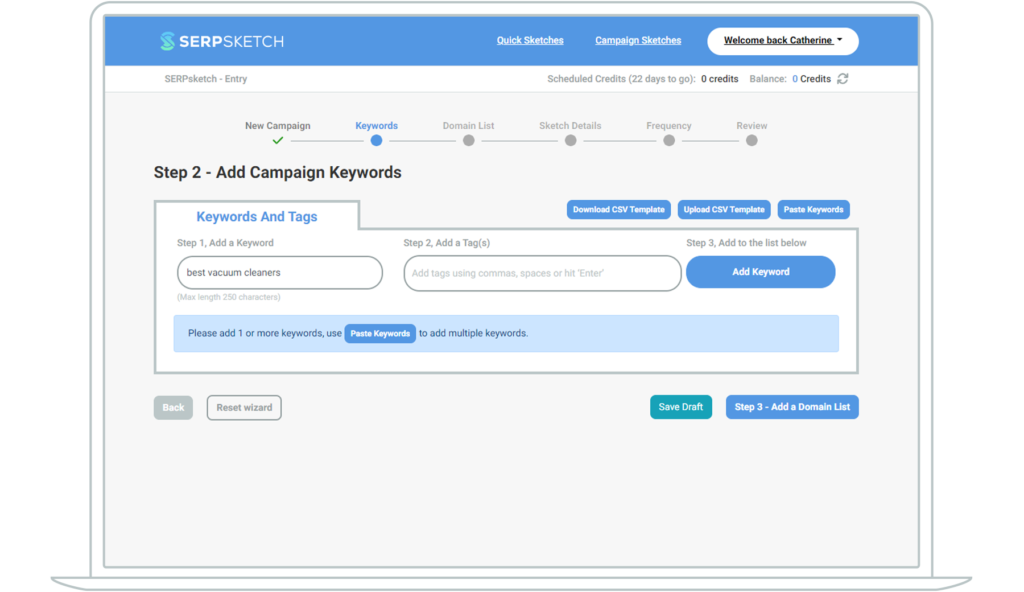
You can add your keywords in a number of ways. Note that you can tag your keywords too. This is useful if you want to group some keywords together. Say for example you’re selling motoring goods ranging from roof boxes to motor oil. You could tag your roof box keywords with #roofbox and so on.
- You can add keywords individually by adding each keyword into the “Add a Keyword” box and then clicking the “Add Keyword” button to the right.
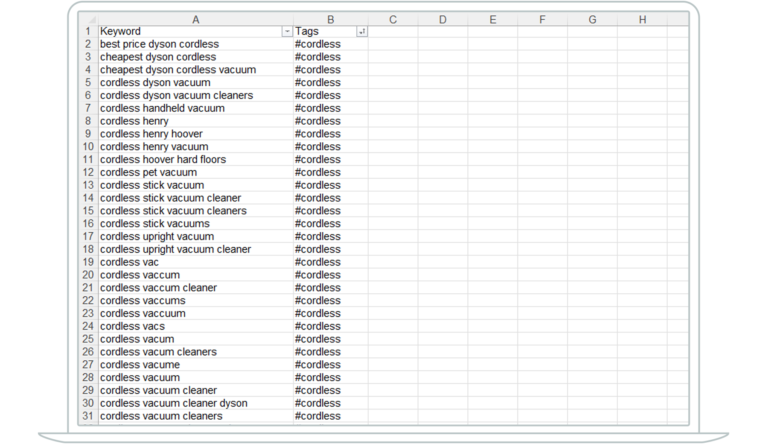
- Or you can download a CSV template, add your keywords into the CSV and import them in bulk.
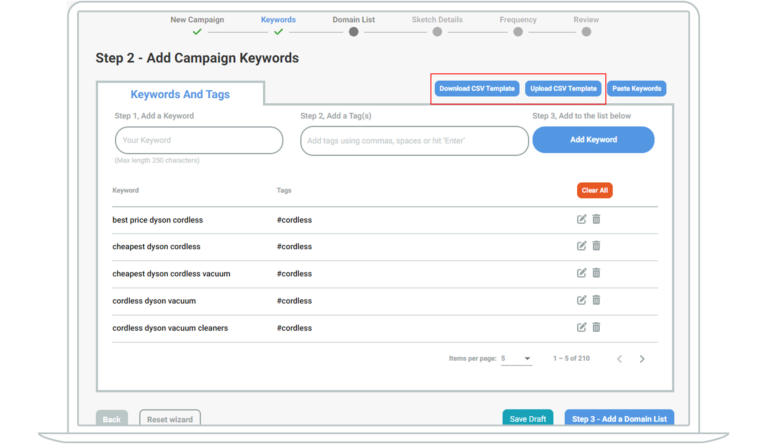
- Or you can copy/paste keywords in bulk as well.
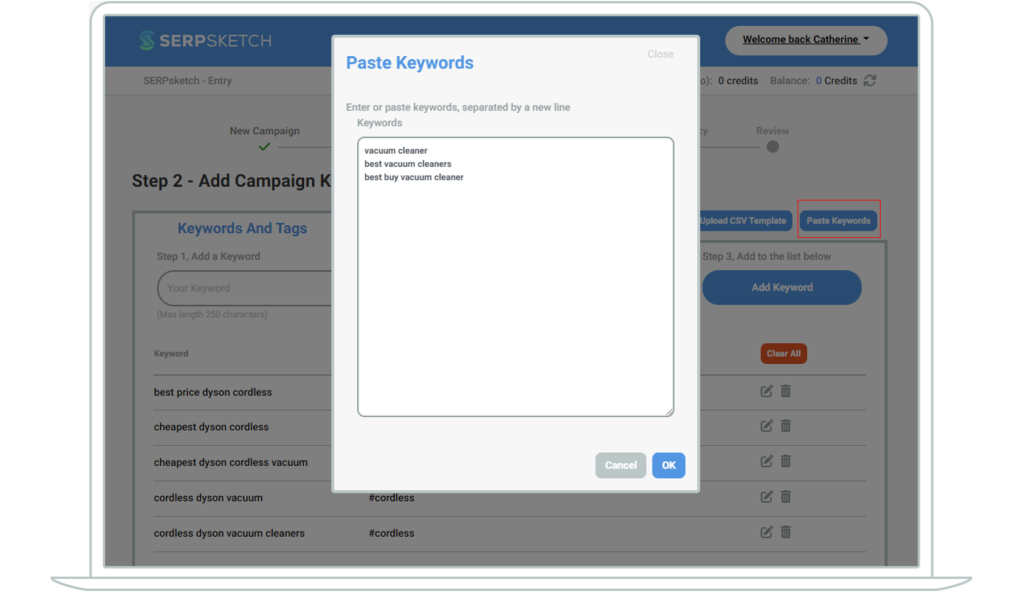
Once you’ve added your keywords, at the bottom right of the page click Step 3 – Add a Domain list.
Adding domains
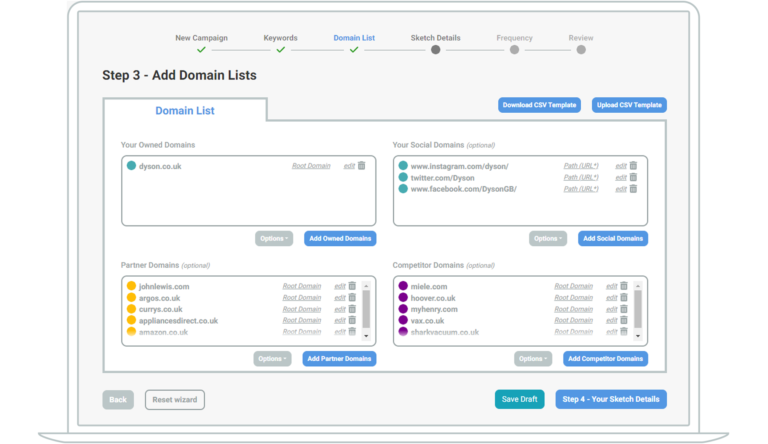
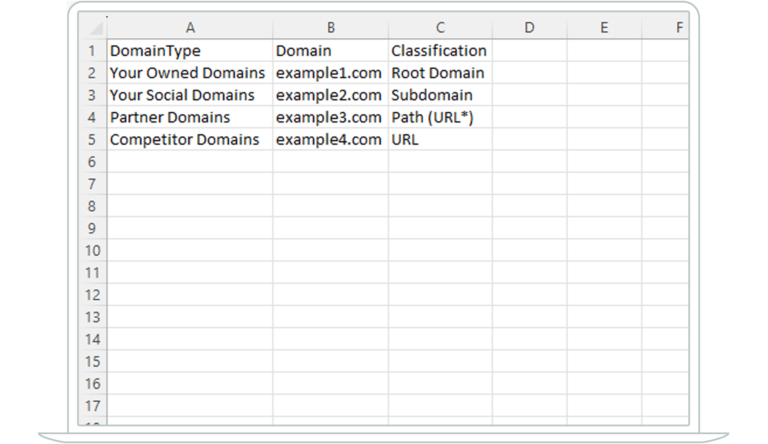
With every type of domain (owned, social, partner, competitor) you can select which level it is tracked at. If you’re looking at the whole domain, sub domain, a path or a single URL.
Typically we see most of our clients want to track the full root domain but there are some cases where you may want to look more granularly:
- Sub Domain: This is useful if you have a site split into smaller sub domains such as specific country sub domains or a knowledge hub versus your commercial site. These enable you to understand which part of your domain is holding the visibility.
- Path: This looks at the whole folder, which can be useful if you were looking at a country sub folder or a particular grouping of products. For example if you’re selecting a partner site, you may only consider them a partner on a particular folder where they stock your brand.
- URL: If you’re looking to understand the visibility of a single page and have a niche landing page you want to be appearing, then you can choose to only see the data at this level too.
Once domains have been added, move to Step 4 to set your sketch details.
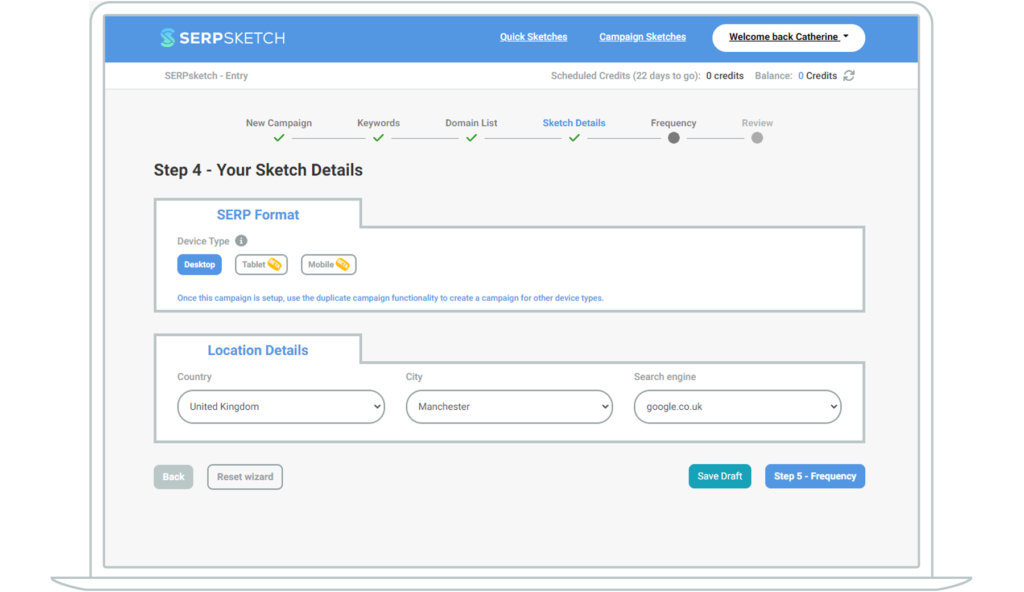
Here you specify what device type you want to run your sketch for. You can choose desktop, tablet or mobile. For mobile, you can choose between iOS and Android.
Then you set your location. Country at a minimum, but you can also select a specific region.
Setting the frequency of the campaign
The final step is to set how frequently you want a campaign to run. Normally we’d recommend weekly or monthly but you might choose to use daily if you’re in the midst of a major event where you want to maintain a high competitive edge e.g. Black Friday.
You can also choose to run the campaign Manually which means you run it whenever you wish to but do not schedule it for specific times.
You can actually schedule a Sketch to run more than once a week or more than once a month by specifying the specific days and times you want it to run. (It’s worth noting that if something drastic has changed in terms of your conversion rates or traffic volumes, you can choose to run your sketch manually as a one-off and capture the results for that point in time, in among your scheduled results too.)
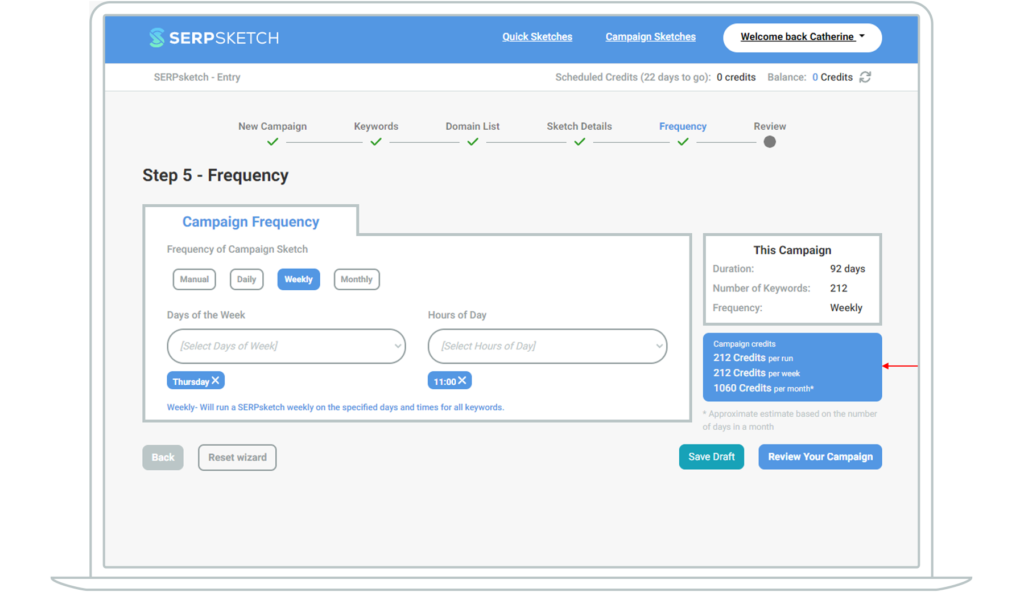
As you select your specific times to run the sketch, on the right hand side, the campaign credits box will show you how many credits you’re estimated to use for that sketch. This allows you to track and control whether you’re reaching your credit limit or not.
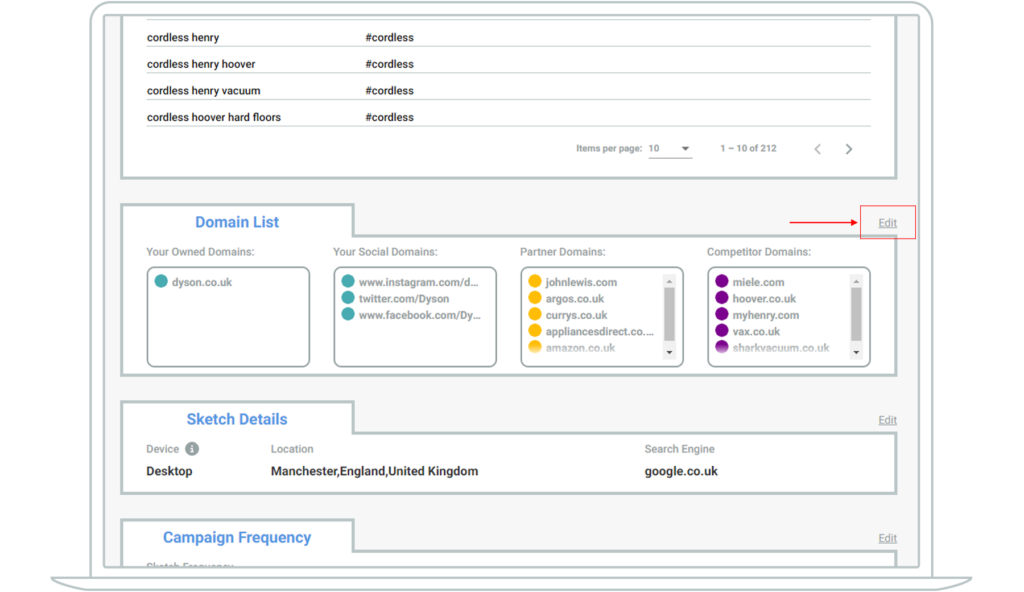
Once all of this is setup you can Review your Campaign before completing setup.
If you spot any section that requires a change you can click Edit to amend it.
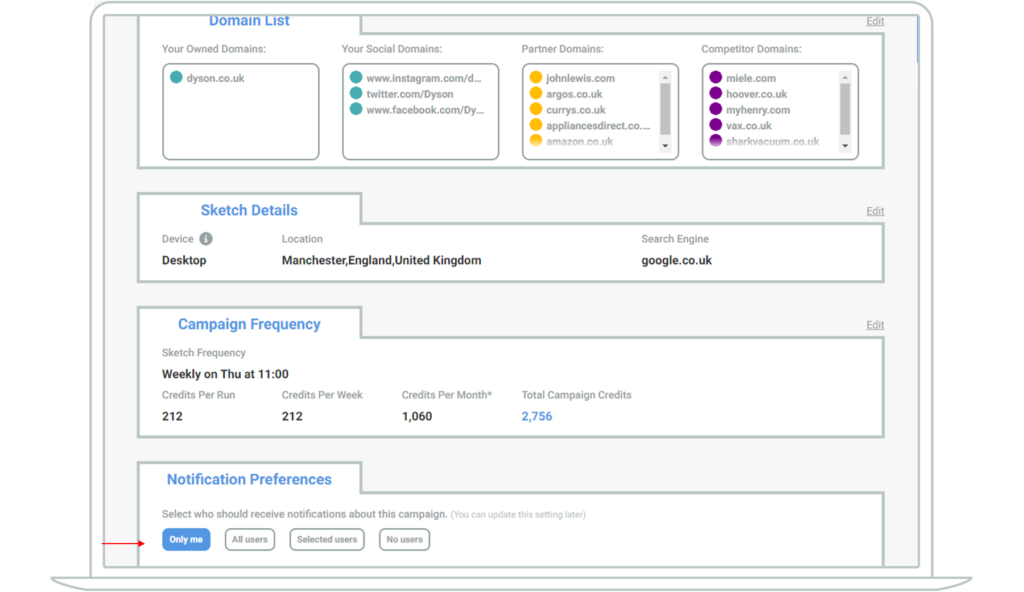
The final thing that you set before completing the setup is who should receive notifications about the campaign. Notifications are sent to Users within your subscription.
Setting the frequency of the campaign
Once a campaign is running, SERPsketch limits what you can edit. This is so that the data captured is exactly comparable day to day, week to week or month to month. You can edit the frequency of an active campaign or you can edit domain types. Let’s say you spot a partner or competitor is listed as “Other” – you can update that to the relevant type.
If you do want to make more extensive edits to a sketch, you can duplicate it and then edit it and save it as a new Campaign. This is useful when you want to run the same sketch on both desktop and mobile or tablets.
So now you know the steps to setting up a Campaign sketch, read our blog about what you see in the results of a sketch.

